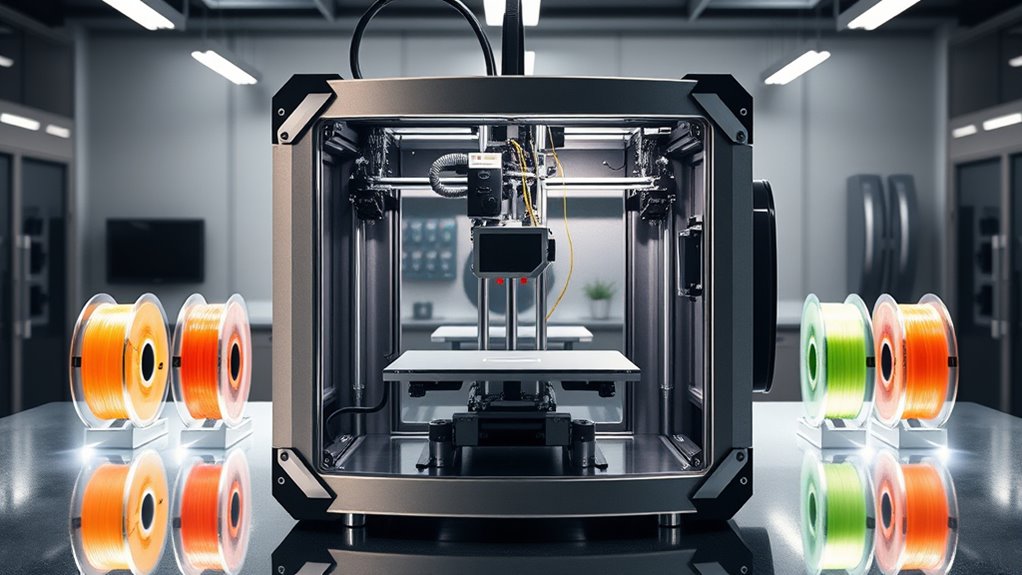

For buyers searching for industrial 3D printers, my best overall pick is the Original Prusa XL, whose two-toolhead setup suits complex, multi-material work better than a basic enclosed FDM machine. The QIDI Max4 Combo stands out for larger parts, while the Snapmaker U1 and FLASHFORGE Creator 5 Pro offer different approaches to multi-toolhead production. The main tradeoffs are build volume, material flexibility, print workflow, and the added upkeep that comes with more specialized hardware. Resin models in this lineup favor fine detail over large, functional parts, while compact FDM printers prioritize accessible operation over production capacity. Read on for the full breakdown and my picks by buyer type.

Get business pricing on tech for your team
- Business-only prices and quantity discounts
- Tax-exempt purchasing
- Multiple users, one account, clear invoices
Complete the kit


Key Takeaways
- The Prusa XL is my best overall pick for buyers who need multi-material flexibility without moving to a four-toolhead system.
- The QIDI Max4 Combo has the clearest large-part role thanks to its 390 × 390 × 340 mm build volume, but that capacity calls for more bench space and careful planning.
- Four-toolhead printers solve a different problem than large-volume printers: the Snapmaker U1 and FLASHFORGE Creator 5 Pro models are aimed at reducing material-change compromises, not simply printing bigger parts.
- Resin and FDM are not direct substitutes. The ELEGOO Jupiter 2 and Saturn 3 favor detailed resin output, while the enclosed FDM options better suit functional components and varied part sizes.
- Automation features do not remove workflow demands. Multi-material feeding, multiple extruders, and resin handling can save steps, but they also add setup, maintenance, and material-management needs.
| Bambu Lab P1S Enclosed FDM 3D Printer |  | Best Compact Enclosed FDM Pick | Printer type: FDM | Design: Enclosed CoreXY | Maximum print speed: 500 mm/s | VIEW ON AMAZON | See Our Full Breakdown |
| QIDI Max4 Combo 3D Printer with 390 × 390 × 340 mm Build Volume |  | Best for Large, High-Temperature Parts | Build volume: 390 × 390 × 340 mm | Maximum printing speed: 800 mm/s | Maximum acceleration: 30,000 mm/s² | VIEW ON AMAZON | See Our Full Breakdown |
| Original Prusa XL 2-Toolhead CoreXY 3D Printer |  | Best for Multi-Material Prototyping | Toolheads: 2 | Build volume: 14.17 × 14.17 × 14.17 inches | Motion system: CoreXY | VIEW ON AMAZON | See Our Full Breakdown |
| Bambu Lab P2S 3D Printer Combo with AMS 2 Pro |  | Best Ready-to-Run Multi-Color FDM Combo | Printer type: FDM | Maximum print speed: 600 mm/s | Included system: AMS 2 Pro | VIEW ON AMAZON | See Our Full Breakdown |
| ELEGOO Jupiter 2 16K Resin 3D Printer |  | Best for High-Detail Resin Production | Build volume: 302.4 × 161.98 × 300 mm | Resolution: 15120 × 6230 | XY resolution: 20 × 26 μm | VIEW ON AMAZON | See Our Full Breakdown |
| Bambu Lab P1S Combo 3D Printer with AMS |  | Best for Compact Multicolor Production | VIEW ON AMAZON | See Our Full Breakdown | |||
| Anycubic Kobra S1 Max Combo 3D Printer with ACE 2 Pro |  | Best for Large Enclosed Parts | VIEW ON AMAZON | See Our Full Breakdown | |||
| Snapmaker U1 3D Printer with Four Toolheads and 5-Second Tool Changer |  | Best for Low-Waste Multi-Material Printing | VIEW ON AMAZON | See Our Full Breakdown | |||
| FLASHFORGE Creator 5 Pro 4-Toolhead CoreXY 3D Printer |  | Best for Filtered Engineering-Material Work | VIEW ON AMAZON | See Our Full Breakdown | |||
| FLASHFORGE Adventurer 5M Pro 3D Printer with 1 Click Auto Printing System |  | Best Compact High-Speed Workhorse | VIEW ON AMAZON | See Our Full Breakdown | |||
| ELEGOO Saturn 3 12K MSLA Resin 3D Printer |  | Best for High-Detail Resin Production | Printer type: MSLA resin 3D printer | LCD: 10-inch 12K monochrome | Resolution: 11520 × 5120 | VIEW ON AMAZON | See Our Full Breakdown |
| FLASHFORGE Creator 5 Pro 3D Printer with Heated Chamber and Four Independent Extruders |  | Best for Enclosed Multi-Material Engineering Prints | Printer type: Industrial 3D printer | Build volume: 256 mm³ (as stated in product data; capacity unclear) | Maximum chamber temperature: 65°C | VIEW ON AMAZON | See Our Full Breakdown |
More Details on Our Top Picks
Bambu Lab P1S Enclosed FDM 3D Printer
The Bambu Lab P1S is a compact enclosed option for shops that want fast FDM production without giving up a large share of their bench. Its 500 mm/s maximum speed and automatic bed leveling reduce setup friction, while the enclosure suits materials such as ABS and ASA. Compared with the much larger QIDI Max4 Combo, the P1S gives up build volume, chamber heating, and support for some abrasive composites, but it is also far lighter and easier to place. The P1S can handle up to 16 colors with an optional AMS; that system is an added purchase, unlike the AMS 2 Pro included with the P2S Combo. Skip it if your work relies on carbon- or glass-fiber-reinforced filament or oversized parts.
Pros:- Enclosure accommodates a range of materials, including ABS and ASA.
- Automatic bed leveling reduces manual setup before jobs.
- Up to 500 mm/s speed supports quicker turnaround on suitable prints.
- Optional AMS enables multi-color printing with up to 16 colors.
Cons:- AMS is required for multi-color and multi-material printing and is not included.
- Carbon- and glass-fiber-reinforced polymers are not recommended.
- Its build capacity is less suited to large one-piece industrial parts than the QIDI Max4 Combo.
Best for: Small production teams and engineering workspaces that need an enclosed, fast FDM printer for routine parts in PLA, PETG, ABS, or ASA.
Not ideal for: Buyers printing large industrial components or regularly using carbon- or glass-fiber-reinforced filament, which this model does not recommend.
- Printer type:FDM
- Design:Enclosed CoreXY
- Maximum print speed:500 mm/s
- Maximum acceleration:20,000 mm/s²
- Bed leveling:Automatic
- Supported filaments:PLA, PETG, TPU, PVA, PET, ABS, ASA
- Multi-color printing:Up to 16 colors with optional Bambu Lab AMS
- Dimensions:15.31 × 18.03 × 15.31 inches
- Weight:38.9 pounds
Our verdict“Choose the P1S for fast, enclosed FDM work in a relatively compact footprint, but choose the QIDI Max4 if larger parts or reinforced materials matter more.”
QIDI Max4 Combo 3D Printer with 390 × 390 × 340 mm Build Volume
The QIDI Max4 Combo earns its place for jobs where part size and material conditions matter more than a small footprint. Its 390 × 390 × 340 mm build volume, 65°C heated chamber, and 370°C hotend make it better suited than the Bambu Lab P1S to large components and demanding materials such as carbon-fiber-reinforced nylon and PPS-CF. A 40 mm³/s high-flow hotend and closed-loop X/Y motors are designed to sustain fast output, while the AI camera can detect failures and pause a job. The tradeoff is substantial: at 120 pounds and 28 inches wide, it needs a dedicated location. Multi-color printing also requires a separate QIDI BOX, and the optional Polar Cooler adds another separately sold component.
Pros:- Large build volume accommodates sizable parts in one piece.
- 65°C heated chamber and 370°C hotend support demanding material workflows.
- Hardened-steel nozzle and high-flow hotend suit abrasive filaments.
- AI monitoring camera can detect a print failure and pause the machine.
Cons:- At 120 pounds, it is difficult to relocate and calls for a substantial workspace.
- Multi-color printing requires a separately purchased QIDI BOX.
- Polar Cooler is optional and sold separately.
Best for: Engineering teams and makers producing large functional parts from high-temperature or reinforced filaments who can dedicate a fixed workspace to the printer.
Not ideal for: Small studios, mobile workspaces, or buyers seeking an all-included multi-color setup; the printer is heavy, and QIDI BOX is sold separately.
- Build volume:390 × 390 × 340 mm
- Maximum printing speed:800 mm/s
- Maximum acceleration:30,000 mm/s²
- Heated chamber:65°C
- Hotend flow rate:40 mm³/s
- Maximum nozzle temperature:370°C
- Nozzle material:Hardened steel
- Compatible materials:PLA, ABS, carbon fiber-reinforced nylon, ABS-CF, PC, PPS-CF
- Item weight:120 pounds
Our verdict“Pick the Max4 for large, material-intensive FDM jobs; its capacity and chamber beat the smaller P1S, but demand more space and separate add-ons.”
Original Prusa XL 2-Toolhead CoreXY 3D Printer
The Original Prusa XL with two toolheads is the strongest fit here for prototypes that combine materials or need soluble supports. Separate tools let it switch between materials without relying on a single nozzle to share filament paths, which can make complex parts more practical than on the Bambu Lab P1S, where multi-color printing depends on an optional AMS. Its 14.17-inch cubed build volume suits larger prototypes, and the segmented heated bed is designed to limit energy use and warping. PrusaSlicer, Prusa Connect, and offline operation give teams flexible workflow options. The cost in space and setup is real: it measures over 35 inches across, weighs 63.4 pounds, and some components require installation after transport.
Pros:- Two toolheads support multi-material work and soluble supports.
- Large, roughly 14-inch cubed build volume accommodates substantial prototypes.
- Segmented heated bed is designed to reduce warping and energy use.
- Supports PrusaSlicer, Prusa Connect, and offline operation.
Cons:- Large footprint can be difficult to fit in a compact workshop.
- Some parts, including the LCD and extruder assembly, require installation after transport.
- Two toolheads serve material changes and supports, not the up-to-16-color setup offered by compatible AMS systems.
Best for: Product development teams and advanced makers who need large prototypes with multiple materials or soluble support structures.
Not ideal for: Users with limited floor or bench space, or buyers who need a printer ready to run immediately after delivery without assembly steps.
- Toolheads:2
- Build volume:14.17 × 14.17 × 14.17 inches
- Motion system:CoreXY
- Bed:Segmented heated bed
- Extruder:Nextruder with Loadcell sensor
- Connectivity:Prusa Connect; offline operation supported
- Dimensions:35.43 × 31.49 × 31.49 inches
- Item weight:63.4 pounds
- Included accessories:Satin print sheet and 1 kg spool of Prusament PLA
Our verdict“Choose the Prusa XL for large, multi-material prototypes and soluble supports, provided you have room for its footprint and can complete the post-transport setup.”
Bambu Lab P2S 3D Printer Combo with AMS 2 Pro
The Bambu Lab P2S Combo makes the clearest case for buyers who want multi-material capability included rather than assembled from separate purchases. Its AMS 2 Pro supports multi-color printing and filament drying up to 65°C, while automatic calibration, AI failure detection, and active flow compensation reduce routine intervention. Against the P1S, it adds faster stated speeds and a more complete filament-management package; against the much larger QIDI Max4, it gives up build capacity and a hotter chamber in exchange for a lighter, more compact machine. The chamber reaches 50°C, with adaptive airflow and a carbon filter for varied materials, but the product data does not specify a build volume or list compatible filaments. This Combo is more compelling than the printer alone if color printing is part of the plan.
Pros:- AMS 2 Pro is included for multi-color and multi-material printing.
- AMS 2 Pro can dry filament at temperatures up to 65°C.
- Automatic calibration and AI failure detection reduce routine oversight.
- Adaptive airflow, a 50°C chamber, and carbon filter support varied material workflows.
Cons:- The printer alone does not support multi-color printing; the Combo is required.
- Its 50°C chamber is less suited to demanding high-temperature work than the QIDI Max4’s 65°C chamber.
- The supplied product data does not state build volume or a compatible-filament list.
Best for: Small production groups and advanced makers who want enclosed FDM printing, automatic monitoring, and multi-color capability with filament drying included.
Not ideal for: Buyers making oversized industrial parts or requiring a documented build volume and material list before choosing a printer.
- Printer type:FDM
- Maximum print speed:600 mm/s
- Included system:AMS 2 Pro
- AMS filament drying temperature:Up to 65°C
- Maximum chamber temperature:50°C
- Features:Automatic calibration, AI failure detection, active flow rate compensation
- Dimensions:18 × 22 × 18 inches
- Item weight:46.3 pounds
- Model number:PF004-U+SA007-AU
Our verdict“Choose the P2S Combo for a more complete multi-color FDM setup with drying and monitoring, but favor the QIDI Max4 for larger, hotter material jobs.”
ELEGOO Jupiter 2 16K Resin 3D Printer
The ELEGOO Jupiter 2 is the resin specialist in this group, aimed at detailed parts rather than the functional thermoplastic work served by the P1S, P2S, or QIDI Max4. Its 16K-class 15120 × 6230 resolution and 20 × 26 μm XY resolution target fine surface detail, while the 302.4 × 161.98 × 300 mm build area leaves room for larger models or batches of smaller pieces. Automatic leveling, tank heating, resin feeding, and print monitoring make its workflow more automated than a basic resin machine. That convenience comes with resin-specific handling and a heavy 63.8-pound body; it is not a substitute for an FDM printer when durable filament parts are the goal. The product data also does not confirm whether the compatible resin automation and air purifier are included.
Pros:- High 15120 × 6230 resolution and 20 × 26 μm XY resolution target fine detail.
- Large resin build volume supports bigger models or batch production.
- Automatic leveling, tank heating, and resin feeding reduce manual workflow steps.
- Camera monitoring and safety alarms add oversight during long prints.
Cons:- Resin printing is a different workflow from FDM and does not replace the P1S or QIDI Max4 for filament parts.
- At 63.8 pounds, the printer is heavy to move.
- The product data does not clarify whether the compatible automated resin system and air purifier are included.
Best for: Dental, jewelry, miniature, or product-design teams prioritizing fine detail and a sizable resin build area over thermoplastic part production.
Not ideal for: Buyers focused on functional FDM components, reinforced filament, or a lightweight machine that can be moved frequently.
- Build volume:302.4 × 161.98 × 300 mm
- Resolution:15120 × 6230
- XY resolution:20 × 26 μm
- Tank preheat temperature:30°C
- Display:4.0-inch touchscreen
- Connectivity:Dual-band Wi-Fi
- Storage:8 GB ROM
- Dimensions:27.95 × 20.08 × 19.29 inches
- Weight:63.8 pounds
Our verdict“Choose the Jupiter 2 when fine resin detail and batch capacity matter more than FDM material versatility or easy relocation.”
Bambu Lab P1S Combo 3D Printer with AMS
The P1S Combo suits buyers who want enclosed, high-speed FDM printing with multicolor capability in a smaller footprint than the Anycubic Kobra S1 Max Combo. Its AMS supports up to 16 colors, giving it room for detailed color-coded parts or material combinations, while automatic bed leveling and a stated setup time of about 15 minutes reduce initial fuss. The enclosure and broad filament list, including ABS and ASA, make it more adaptable than an open desktop machine. However, it is not the pick for every engineering filament: the product data specifically advises against carbon- or glass-fiber-reinforced polymers. Multicolor printing also depends on the included AMS, and its build capacity is far smaller than the Kobra S1 Max’s 350 mm cube. I rank it here for capable, relatively compact enclosed production rather than oversized parts or fiber-filled materials.
Pros:- Enclosed CoreXY design supports a broad range of listed filaments, including ABS and ASA.
- Included AMS enables multicolor and multi-material printing, with capacity for up to 16 colors.
- Automatic bed leveling and an approximately 15-minute setup target simplify startup.
- Maximum speed of 500 mm/s and acceleration of 20,000 mm/s² support quick job turnaround.
Cons:- Carbon- and glass-fiber-reinforced polymers are not recommended.
- Its build volume is not specified in the supplied product data, limiting direct capacity comparisons.
- Multicolor printing depends on the AMS system rather than a standalone printer configuration.
Best for: Small engineering teams and makers who need an enclosed printer for compact functional parts, with frequent multicolor or multi-material jobs.
Not ideal for: Shops producing large one-piece parts or relying on carbon- or glass-fiber-reinforced filament; its build area is limited and those materials are not recommended.
Our verdict“Choose the P1S Combo for compact enclosed production and flexible color work, but pick the Kobra S1 Max Combo for much larger parts or a heated chamber.”
Anycubic Kobra S1 Max Combo 3D Printer with ACE 2 Pro
For parts that outgrow desktop-sized machines, the Kobra S1 Max Combo makes the strongest case in this group: its 350 × 350 × 350 mm build volume can accommodate many larger components in one piece, unlike the 270 mm cube of the Snapmaker U1. A heated chamber rated to 65°C and a 350°C hotend widen its material range, while 49-point auto-leveling and flow calibration address setup and consistency. It also offers four-color printing out of the box, expandable to 16 colors with additional ACE 2 Pro units. That expansion is a real commitment, and the printer’s 77.8-pound weight makes repositioning less convenient than with the lighter FLASHFORGE Creator 5 Pro. I’d rank it ahead of smaller machines when size and chamber control matter more than portability.
Pros:- Large 350 × 350 × 350 mm build volume accommodates sizable prints in one piece.
- 65°C heated chamber and 350°C hotend support a range of listed engineering and consumer filaments.
- Four-color printing is included, with expansion possible up to 16 colors.
- 49-point auto-leveling and flow calibration support repeatable setup.
Cons:- The 77.8-pound weight makes moving or repositioning the printer difficult.
- Expanding from four to 16 colors requires additional ACE 2 Pro units.
- Its 21 × 23 × 19-inch dimensions demand more bench space than compact options such as the Bambu Lab P1S Combo.
Best for: Product developers, small fabrication shops, and makers who need large enclosed parts and want the option to expand multicolor capacity later.
Not ideal for: Users with limited bench space, frequent printer moves, or a need for 16-color printing without buying additional ACE 2 Pro units.
Our verdict“Pick the Kobra S1 Max Combo when a large heated build chamber matters more than a light, compact setup.”
Snapmaker U1 3D Printer with Four Toolheads and 5-Second Tool Changer
The Snapmaker U1’s defining advantage is its four independent toolheads: instead of relying on one nozzle to cycle through colors, it changes tools in about five seconds. That approach can reduce the filament purging associated with swaps, making it a practical choice for frequent multi-material jobs. Compared with the Bambu Lab P1S Combo, the U1 has a smaller stated capacity for color work—four toolheads rather than up to 16 colors—but offers a direct route to separate loaded materials. Its 270 × 270 × 270 mm build volume is also more constrained than the Anycubic Kobra S1 Max’s large cube. Automatic calibration, vibration compensation, touchscreen controls, and app monitoring round out a workflow-focused package. The tradeoff is a substantial 57.9-pound body and less room for large parts, so I’d favor it for mixed-material efficiency over sheer production size.
Pros:- Four independent toolheads support multiple loaded materials without repeated manual swaps.
- Approximately five-second tool changes can reduce waiting and filament purge waste.
- Automatic calibration and vibration compensation reduce routine setup adjustments.
- Broad listed material compatibility includes PLA, TPU, PETG, ABS, ASA, PA, and PC.
Cons:- The 270 × 270 × 270 mm build volume is smaller than the Anycubic Kobra S1 Max Combo’s.
- At 57.9 pounds, it is not an easy printer to relocate.
- The supplied specifications do not state a heated chamber temperature, unlike the Kobra S1 Max and Creator 5 Pro.
Best for: Makers and small teams that print frequent color or material changes and want separate toolheads to limit purge waste.
Not ideal for: Shops that need large one-piece components or a lightweight printer they can move between work areas.
Our verdict“Choose the U1 for frequent, lower-waste multi-material work in medium-sized parts, not for maximum build capacity.”
FLASHFORGE Creator 5 Pro 4-Toolhead CoreXY 3D Printer
The Creator 5 Pro combines four independent toolheads with a seven-second changer, making it a strong fit for multi-material work where reducing purge waste matters. Its 65°C heated chamber and stated support for ABS, PC, and PA point it toward engineering-oriented jobs, while HEPA 13 and activated carbon filtration add a layer of particle and fume management absent from the Snapmaker U1’s listed features. The U1 changes tools faster, but the Creator 5 Pro counters with a stated maximum speed of 600 mm/s and remote monitoring through a chamber camera and controls. This is still a compact machine, not a large-format alternative to the Anycubic Kobra S1 Max. The available product data also gives no build volume, so buyers should verify part capacity before committing. Its chamber tops out at 65°C, which may limit some demanding workflows.
Pros:- Four independent toolheads and a seven-second changer support multi-material printing with reduced purge waste.
- 65°C heated chamber and listed ABS, PC, and PA compatibility suit engineering-material jobs.
- HEPA 13 and activated carbon filtration address particles and fumes.
- CoreXY motion is specified for speeds up to 600 mm/s, with camera monitoring and remote controls.
Cons:- The heated chamber is limited to a maximum of 65°C.
- The supplied product data does not specify build volume, making capacity comparisons difficult.
- Its seven-second tool change is slower than the Snapmaker U1’s approximately five-second change.
Best for: Small engineering labs and workshops printing ABS, PC, or PA that want multiple toolheads, chamber heating, filtration, and remote monitoring.
Not ideal for: Buyers who need a documented large build volume, a chamber hotter than 65°C, or the quickest tool changes in this lineup.
Our verdict“Choose the Creator 5 Pro for filtered, heated-chamber multi-material work, provided its unspecified build volume fits your parts.”
FLASHFORGE Adventurer 5M Pro 3D Printer with 1 Click Auto Printing System
The Adventurer 5M Pro is the most straightforward choice here for fast, single-nozzle production in a compact 220 × 220 × 220 mm format. Its CoreXY system reaches a stated 600 mm/s, and one-click auto-leveling, vibration compensation, and a quick-swap nozzle make routine jobs easier to set up and change over. Unlike the four-toolhead Snapmaker U1 and Creator 5 Pro, it does not offer independent toolheads for color or material swaps; that keeps its workflow simpler but makes it a weaker fit for frequent multicolor work. A 280°C nozzle and 110°C heated bed cover listed materials such as ABS, ASA, and PETG-CF, while the enclosure, dual filtration, and under-50 dB operating claim suit shared spaces. The limited build volume and lack of supplied detailed specs mean it is better treated as a compact production tool than a full industrial platform.
Pros:- CoreXY system is specified for speeds up to 600 mm/s with 20,000 mm/s² acceleration.
- One-click auto-leveling and vibration compensation simplify setup and support cleaner surfaces.
- Tool-free nozzle swaps take about three seconds, with 0.25, 0.4, 0.6, and 0.8 mm options.
- Enclosure, dual filtration, camera monitoring, and mobile controls suit monitored shared-space use.
Cons:- The 220 × 220 × 220 mm build volume is substantially smaller than the Anycubic Kobra S1 Max Combo’s.
- It lacks independent toolheads, making it less suited to frequent multi-color or multi-material jobs than the Snapmaker U1.
- The supplied product data does not state a heated chamber temperature or item weight.
Best for: Schools, offices, and small workshops that need a compact, enclosed printer for quick single-material parts and routine prototyping.
Not ideal for: Production teams needing large parts, independent multi-material toolheads, or verified chamber-heating specifications for demanding engineering materials.
Our verdict“Pick the Adventurer 5M Pro for compact, fast prototyping with easy calibration, but choose a four-toolhead model for regular multi-material production.”
ELEGOO Saturn 3 12K MSLA Resin 3D Printer
I’d choose the Saturn 3 when fine surface detail matters more than the material flexibility of an enclosed filament machine. Its 12K monochrome LCD and 19 × 24 μm XY resolution are suited to detailed prototypes, miniatures, and small components, while the 218.88 × 122.88 × 250 mm build area leaves room for larger resin parts or multiple pieces at once. Compared with the ELEGOO Jupiter 2, this model has a smaller stated build volume, so it is less suited to oversized resin runs; its appeal is a more compact footprint with a clearly specified resolution. The 405 nm COB light source and Fresnel lens are designed for even exposure. The tradeoff is inherent to resin printing: parts need resin-compatible handling and cleanup, making this a poorer fit for low-mess production workflows.
Pros:- 12K monochrome LCD and 19 × 24 μm XY resolution support fine detail.
- Build volume accommodates larger resin models or several smaller parts in one run.
- 405 nm COB light source with Fresnel lens is specified for over 90% light uniformity.
- Supports open-source GOO slicing and third-party slicers including CHITUBOX and Lychee Slicer.
Cons:- Resin requires careful handling and post-print cleanup rather than the straightforward part removal of many filament workflows.
- Maximum listed print speed is up to 70 mm/h, which may limit throughput for production schedules.
- Its build volume is smaller than the ELEGOO Jupiter 2, making it less suitable for oversized resin pieces.
Best for: Makers and small product-development teams printing detailed resin prototypes, miniatures, or compact batches where surface definition matters more than quick cleanup.
Not ideal for: Shops focused on large functional parts, varied engineering filaments, or a simple low-mess workflow; resin handling and post-print cleanup add work, and the Jupiter 2 is the more relevant comparison for buyers prioritizing larger resin capacity.
- Printer type:MSLA resin 3D printer
- LCD:10-inch 12K monochrome
- Resolution:11520 × 5120
- XY resolution:19 × 24 μm
- Build volume:218.88 × 122.88 × 250 mm
- Maximum printing speed:Up to 70 mm/h
- Light source:405 nm COB with Fresnel collimating lens
- Software and format:Voxeldance Tango; supports open-source GOO
Our verdict“Choose the Saturn 3 for detailed resin parts in a modest production footprint, but skip it if material versatility or minimal cleanup is the priority.”
FLASHFORGE Creator 5 Pro 3D Printer with Heated Chamber and Four Independent Extruders
For demanding filament work, I’d put the Creator 5 Pro ahead of general-purpose enclosed printers when material control and separate toolheads are the draw. Its 65°C heated chamber is designed to support ABS, ASA, PC, and Nylon, while four independent extruders can handle multi-color or multi-material jobs without relying on a shared nozzle. That makes it a different proposition from the Bambu Lab P1S, which is an enclosed alternative but does not offer the stated actively heated chamber and four independent toolheads. The CoreXY system is rated for up to 600 mm/s, and HEPA13 filtration adds a containment feature for enclosed operation. The main reservation is the published build-volume figure: “256 mm³” does not clearly describe usable capacity. At nearly 49 pounds and about 20 inches per side, it also needs a dedicated, sturdy workspace.
Pros:- Actively heated chamber reaches 65°C to support printing materials prone to warping.
- Four independent toolheads enable multi-material and multi-color work without shared-nozzle purging.
- Sealed enclosure with HEPA13 filtration provides a specified filtration setup.
- CoreXY motion system is rated for speeds up to 600 mm/s and acceleration up to 30,000 mm/s².
Cons:- The stated build volume of 256 mm³ is ambiguous and does not provide a dependable capacity for part planning.
- Its roughly 20-inch footprint and 48.9-pound weight call for a dedicated, sturdy workspace.
- The heated chamber and four-toolhead system add complexity that may be unnecessary for routine single-material printing.
Best for: Engineering teams and advanced makers who print ABS, ASA, PC, or Nylon and need independent toolheads for multi-material or multi-color parts in an enclosed machine.
Not ideal for: Buyers who need a clearly documented build area before planning parts, have limited bench space, or mainly print standard filament without needing a heated chamber or multiple toolheads.
- Printer type:Industrial 3D printer
- Build volume:256 mm³ (as stated in product data; capacity unclear)
- Maximum chamber temperature:65°C
- Extruders:4 independent toolheads
- Maximum print speed:600 mm/s
- Maximum acceleration:30,000 mm/s²
- Frame and motion system:All-metal frame, CoreXY
- Filtration and materials:HEPA13; ABS, ASA, PC, and Nylon listed
- Dimensions and weight:19.5 × 20.7 × 20.4 in; 48.9 lb
Our verdict“Choose the Creator 5 Pro for enclosed engineering-material and multi-toolhead work, but wait for a clearly specified build volume if part size is central to your decision.”

How We Picked
I ranked these machines by how well their stated design and features fit real production and prototyping needs: build capacity, material and toolhead flexibility, enclosure or chamber provisions, workflow automation, and the likely maintenance burden. I also weighed whether a printer’s specialization solves a meaningful shop problem, rather than treating more toolheads or a larger spec sheet as an automatic advantage.
The order favors versatile machines that can serve a broad range of functional-part and prototyping work, followed by options with narrower strengths such as large builds, multi-toolhead workflows, or resin detail. The P1S and Adventurer 5M Pro are more accessible FDM choices, but their positioning is less production-focused than the top picks. Resin printers sit lower for general industrial use because their material and post-processing workflow differs sharply from enclosed FDM. Product specifications and advertised capabilities are not a substitute for confirming material compatibility, operating requirements, and service support for a particular shop.
Factors to Consider When Choosing Industrial 3d Printers 2
Choosing an industrial 3D printer starts with the parts and workflow you need, not with the largest build volume or the most toolheads. These broader checks can help you avoid buying capacity you will not use—or a machine that cannot handle your production requirements.
Match the process to the part’s job
Start by defining what a successful part must do: withstand heat, carry a load, fit a tight tolerance, or show fine surface detail. FDM and resin systems produce parts through different processes, so a resin printer is not an automatic upgrade for functional components. Resin can suit detailed models and small intricate features, while FDM is often the more direct fit for larger functional parts and varied filament use. Before committing, check the exact material properties and print settings for the application rather than relying on broad labels such as industrial. A common mistake is to buy for appearance alone, then discover the process does not meet durability or handling needs. If the part will go into service, test a representative design and material before making the printer a production dependency.
Treat build volume as usable capacity, not a headline number
A large build area matters only if your parts can be printed within it and the machine fits the workspace needed to run it. Measure the printer’s full footprint, access for loading materials, and room for routine maintenance—not just the advertised build dimensions. Larger parts can reduce assembly steps, but long prints also tie up the machine and make a failed job more costly in time and material. Splitting a design may be more practical when joints, fasteners, or modular replacement are acceptable. Think about the batch size you expect, too: a printer that fits one large part may be less productive than a smaller machine that runs several jobs. Choose capacity around your most frequent work, with some headroom for occasional oversized jobs.
Pay for extra toolheads only when they change the workflow
Multiple toolheads can make it easier to combine materials, colors, or support types, but the benefit depends on the jobs you actually run. They add hardware and setup complexity, and a fast tool change does not by itself guarantee a shorter total job. Compare the full workflow, including how materials are loaded, how toolheads are maintained, and what happens when one needs service. If most jobs use one material, a simpler printer may be easier to keep productive. Shops that regularly print complex supports or multiple materials may gain more from a multi-toolhead system. Ask whether the feature reduces manual steps or scrap in your specific process before paying for it.
Plan for material storage and post-processing
Printer capability is only one part of a reliable workflow. Filaments and resins have different storage, handling, and cleanup needs, so account for those requirements when comparing machine types. Resin work can involve additional washing, curing, protective equipment, and waste handling beyond the print itself. Automated material systems can simplify some loading tasks, but they do not remove the need to track material condition and compatibility. Map the space, staff time, and safety procedures required from job start through finished part. Underestimating these steps can turn a seemingly capable machine into a bottleneck.
Check serviceability, support, and downtime plans
A printer used for production needs a maintenance plan as much as a print plan. Find out which wear parts need routine replacement, how accessible common service points are, and what support channels are available in your region. A specialized machine may perform a valuable task but create a single point of failure if no backup process exists. Consider whether your team can diagnose routine issues and whether a failed component would halt all work or only one job type. Keep likely consumables and critical spares in view when estimating the ongoing workload. If deadlines matter, a simpler printer with a clear service path can be a better fit than a more capable system your team cannot maintain.
Compare total workflow cost, not just printer capability
Build a practical ownership estimate that includes materials, replacement parts, staff time, post-processing, and the cost of failed or delayed jobs. A machine that automates material changes may reduce hands-on work, while a larger or more specialized model may need more space and more involved upkeep. Avoid assuming that a higher-capability printer will automatically increase output; job preparation and finishing can remain the limiting steps. When the business case is uncertain, compare the cost of buying with the cost of outsourcing the same part family. Prioritize features that remove a known bottleneck rather than features that might be useful someday. This approach can make a less elaborate printer the better production purchase.
Frequently Asked Questions
Which printer in this roundup is the safest choice for a shop that prints varied functional parts?
My best overall choice is the Original Prusa XL because its two-toolhead arrangement gives it broader workflow flexibility than a basic enclosed FDM option. That does not make it the right machine for every material or every production environment, so confirm compatibility with the exact filament and part requirements. If your main need is fitting larger parts on the bed, the QIDI Max4 Combo is the more direct alternative. If nearly all work uses one material, a simpler enclosed printer may be easier to operate. Choose based on your recurring parts, not the widest feature list.
Should I choose a four-toolhead printer or a large-build-volume printer?
Choose by the constraint that most often slows your work. A large-build-volume machine such as the QIDI Max4 Combo makes sense when parts are too large for smaller beds or when you want fewer assembly sections. A four-toolhead model such as the Snapmaker U1 or FLASHFORGE Creator 5 Pro is aimed more at jobs that benefit from multiple materials or tools. These strengths do not replace each other: toolheads do not provide extra build space, and a larger bed does not simplify multi-material printing. If both needs occur regularly, compare job frequency, available space, and how much additional setup your team can handle.
When is a resin printer a better choice than an enclosed FDM printer?
A resin machine is a stronger candidate when small features and fine detail matter more than producing larger functional parts. The ELEGOO Jupiter 2 and Saturn 3 are the resin options here, while the FDM printers cover a different mix of size, material, and workshop use. Resin also brings extra steps for handling and finishing, so evaluate the whole process rather than print resolution alone. For parts that must tolerate specific mechanical or environmental conditions, verify the material’s documented performance against the application. If your work is mostly fixtures, brackets, or larger prototypes, an enclosed FDM model may fit the workflow better.
Is an automated material system enough to make a printer production-ready?
No. Features such as an automated material system can reduce some manual loading and material changes, but production readiness also depends on repeatability, maintenance, job preparation, and support. A combo system may suit a shop that regularly changes colors or materials, while a simpler configuration may be easier to keep running for single-material work. Check how the system handles the materials you intend to use and what routine care it requires. Also plan for what happens when the feeding system needs attention during a scheduled run. Automation helps most when it addresses a repeated task your team already spends time on.
What should I verify before buying a printer for paid or deadline-driven work?
Confirm the usable build area, material compatibility, workspace needs, maintenance access, and local support before placing a machine into a deadline-sensitive workflow. Ask how long routine service takes and which parts are expected to wear, then decide whether you need spares or a backup process. Run a representative part through the full workflow, including finishing and inspection, rather than judging from a short sample print. For resin, include washing, curing, and safe handling in the plan; for multi-toolhead FDM, account for setup and tool maintenance. A printer is a production asset only when the surrounding process can deliver finished parts reliably.
Conclusion
For a broad mix of prototyping and functional-part work, I recommend the Original Prusa XL as best overall; it offers a useful middle ground between basic enclosed FDM and more specialized multi-toolhead systems. The QIDI Max4 Combo is my pick for larger parts, while the Bambu Lab P1S is the simpler value-minded choice for buyers who do not need an elaborate production setup. Beginners should start with a straightforward enclosed FDM option such as the FLASHFORGE Adventurer 5M Pro, rather than taking on resin cleanup or a multi-toolhead workflow immediately. For premium multi-material work, compare the Snapmaker U1 and FLASHFORGE Creator 5 Pro models against the jobs you run most often. If fine resin detail is the specific requirement, choose between the ELEGOO Jupiter 2 and Saturn 3 based on the build capacity and detail needs of your parts.