To build a self-healing materials project at home, start by choosing a simple base like silicone or epoxy resin. Mix in microcapsules filled with healing agents or create vascular networks within the material. Damage the sample with scratches or bending, then observe how the healing agents are released to repair the cracks. Experimenting with different materials and techniques can help you understand how these smart materials work. Keep exploring to discover more fascinating details about this innovative science.
Key Takeaways
- Select a base material like silicone or epoxy resin and mix in microcapsules containing healing agents.
- Incorporate microcapsules evenly into the mixture following precise instructions for consistent distribution.
- Create intentional damage such as scratches or cracks to activate the self-healing process.
- Observe how healing agents are released to fill and seal cracks, restoring material integrity.
- Experiment with environmental factors and catalysts to optimize healing efficiency and durability.

Creating your own self-healing materials at home is an exciting way to explore advanced science and engineering concepts firsthand. When you immerse yourself in this project, you’ll discover how smart materials can be harnessed to develop substances that repair themselves after damage. These innovative materials are designed with embedded repair techniques that activate when cracks or fractures occur, mimicking biological healing processes. This hands-on experience not only deepens your understanding of material science but also shows you how to apply these concepts practically.
Discover self-healing materials at home to explore innovative science and engineering concepts firsthand.
To start, choose a base material that’s easy to work with, like silicone or epoxy resin. These serve as a solid foundation for experimenting with self-healing properties. Incorporate microcapsules or vascular networks filled with healing agents into your mixture. When a crack forms, these capsules rupture, releasing repair substances that fill and seal the damage site. This process is a key example of a smart material’s repair techniques, which rely on the material’s innate ability to recognize damage and respond accordingly. You can also explore adding catalysts or accelerators to speed up the healing process or improve the strength of the repaired area.
Mixing these components requires precision and patience. Follow instructions carefully to guarantee the microcapsules are evenly distributed within the matrix. Once your composite material is prepared, create small samples and intentionally damage them—perhaps by scratching or bending. Observe how the self-healing mechanism kicks in: the healing agents are released, filling the cracks and restoring the integrity of the material. This real-world demonstration showcases how smart materials operate, making the invisible process of healing visible and tangible.
As you experiment, consider how different repair techniques influence the efficiency of self-healing. Some methods rely solely on physical responses, while others incorporate chemical reactions that strengthen the repair zone. Testing various approaches will help you understand which techniques work best for specific damage types and conditions. Additionally, you can explore how environmental factors—like temperature or humidity—affect healing performance. Document your results meticulously, noting which combinations yield the most resilient repairs.
Building a self-healing materials project at home not only sparks curiosity but also provides insight into cutting-edge innovations that could revolutionize industries—from aerospace to biomedical devices. By understanding the principles behind smart materials and repair techniques, you gain a deeper appreciation for how science can create sustainable, long-lasting solutions. Exploring material science techniques in your experiments can help you understand the underlying mechanisms that make these materials effective. This project empowers you to experiment with the future of materials science in your own home, making complex concepts accessible and inspiring your next scientific adventure.

LET'S RESIN Epoxy Resin Kits and Molds Complete Set, 16oz Resin Art Kit with Silicone Molds, Pigment, Dried Flowers, Crafts for Adults, Beginners, Art Supplies for DIY Lovers, DIY Gift for Women
All in One Epoxy Resin Kit: Dive into resin art with our complete kit featuring 4 versatile silicone…
As an affiliate, we earn on qualifying purchases.
As an affiliate, we earn on qualifying purchases.
Frequently Asked Questions
What Safety Precautions Are Necessary for DIY Self-Healing Materials?
You should prioritize chemical safety by wearing gloves, goggles, and a mask to avoid skin and eye contact. Guarantee proper ventilation in your workspace to prevent inhaling fumes from chemicals or adhesives. Keep your work area clean and store chemicals securely. Never mix chemicals without understanding their reactions, and always work in a well-ventilated space to protect yourself from harmful fumes. Safety first for a successful DIY project!
Can I Customize the Self-Healing Properties for Specific Applications?
Yes, you can customize the self-healing properties for specific applications. Think of your material as a chameleon adapting to its environment; by adjusting composition and healing agents, you tailor its response to particular stresses. Material customization allows you to enhance healing speed, strength, or flexibility, ensuring your self-healing material fits your project’s unique needs. Focus on application specificity to create a resilient, adaptive material that works seamlessly in your intended setting.
How Long Does a Typical Self-Healing Process Take?
A typical self-healing process takes anywhere from a few hours to several days, depending on the material’s performance and healing efficiency. You’ll notice cracks or damages start to mend as the material activates its healing mechanism, usually triggered by heat, moisture, or pressure. The speed varies with factors like material composition and environmental conditions, but patience guarantees ideal healing and restored strength in your project.
Are There Eco-Friendly or Biodegradable Self-Healing Materials Available?
Yes, eco-friendly and biodegradable self-healing materials are available. You can use biodegradable polymers, which naturally break down without harming the environment, or eco-friendly composites that incorporate sustainable components. These materials actively repair their damage, reducing waste and environmental impact. By choosing biodegradable polymers or eco-friendly composites in your projects, you contribute to sustainability while exploring innovative self-healing technologies at home.
What Are the Common Challenges Faced During Home-Based Projects?
Managing a home-based project can feel like walking a tightrope, with common challenges including material sourcing and technical expertise. You might struggle to find eco-friendly or biodegradable materials or lack the technical skills needed for proper assembly. These hurdles require patience and resourcefulness. To succeed, research reliable sources for sustainable materials and seek online tutorials or expert advice to build your confidence and ensure your self-healing project thrives.
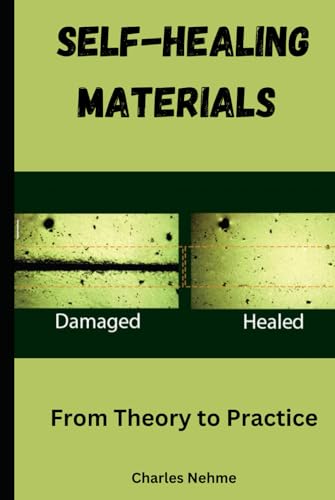
Self-Healing Materials: From Theory to Practice
As an affiliate, we earn on qualifying purchases.
As an affiliate, we earn on qualifying purchases.
Conclusion
Now that you’ve started your self-healing materials project at home, remember that patience and persistence are key. Don’t expect miracles overnight, but with steady effort, you’ll see progress unfold. Think of it as planting seeds—you may not see the full bloom immediately, but your work is laying the foundation for something remarkable. Keep experimenting and learning; sometimes, the best breakthroughs come from sticking with it through thick and thin.

CRAFT RESIN 34 Oz Crystal Clear Epoxy Resin Kit – Food Safe & UV Resistant for DIY Art, Wood, Jewelry Making, Coasters, Molds Casting Resin Epoxy – Low Viscosity, Self Leveling for Beginners & Pros
ARTISAN APPROVED QUALITY – Unlock your artistic potential with Craft Resin. Premium clear epoxy resin kit and hardener…
As an affiliate, we earn on qualifying purchases.
As an affiliate, we earn on qualifying purchases.

Self Healing Sewing Mat, Exacto Knife Precision Carving Craft Hobby Knife Kit for DIY Art Work Cutting, Hobby, Stencil, Scrapbooking-A4 (Pink)
【Package Includes】Exacto Knife kit comes with 1 PCS carving craft knives, 20 PCS blades, 1 PCS Steel Rule1…
As an affiliate, we earn on qualifying purchases.
As an affiliate, we earn on qualifying purchases.