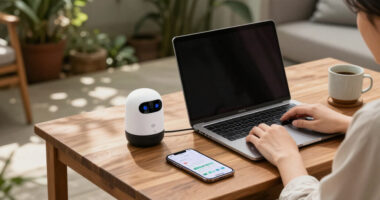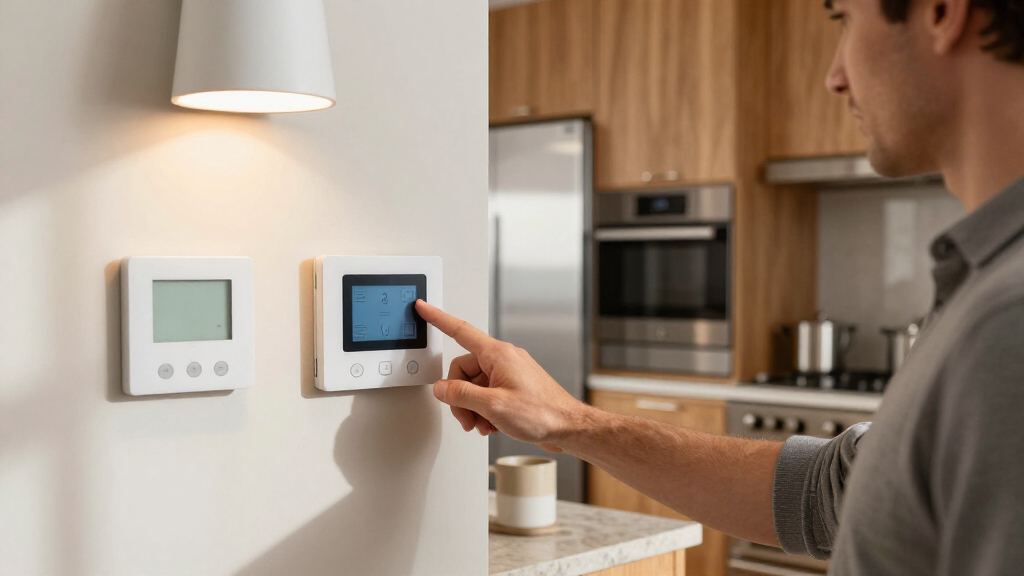

Set up AI-powered home automation devices by choosing compatible products, connecting them to your home network and smart-home platform, configuring privacy and access, and testing a small number of routines. This guide is for beginners setting up devices such as smart speakers, lights, thermostats, plugs, sensors, or cameras. Allow 1–3 hours, depending on how many devices you install and whether your Wi-Fi needs changes.

Get business pricing on tech for your team
- Business-only prices and quantity discounts
- Tax-exempt purchasing
- Multiple users, one account, clear invoices

Hubitat Elevation C-8 Pro Smart Home Hub
- ✔ Protocols: Matter 1.5, Z-Wave 800 Series with Long Range, Zigbee 3.0, Bluetooth
- ✔ Voice assistants: Amazon Alexa, Google Home, Apple HomeKit
- ✔ Device compatibility: 1,000+ devices across 100+ brands
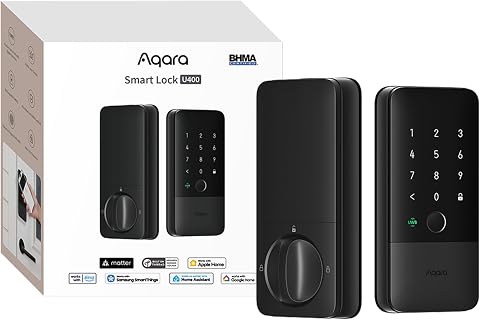
Aqara U400 UWB Smart Lock with Apple Home Key and Fingerprint Deadbolt, Black
- ✔ Unlock methods: UWB, Apple Home Key, fingerprint, passcode, app, voice assistant, NFC card, physical key
- ✔ Connectivity: Matter over Thread
- ✔ Battery: Removable rechargeable lithium battery; up to 6 months per charge
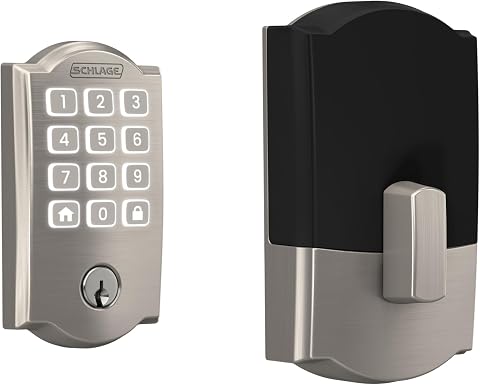
Schlage Arrive Smart WiFi Deadbolt with Camelot Trim, Satin Nickel
- ✔ Connectivity: WiFi and Bluetooth
- ✔ App: Schlage Home
- ✔ Access codes: Up to 250
AI features vary by product. Some devices interpret voice requests or learn schedules; others use rules that you create yourself. Follow the manufacturer’s app and instructions for the exact model, and use the steps below to build a setup that is reliable, secure, and easy to check.
Difficulty: Beginner | Time: 1-3 hours
What You’ll Need
Tools & Materials:
- Smartphone or tablet with the device manufacturer’s app
- Home Wi-Fi network and its password
- AI-capable devices, power adapters, and any included mounting hardware
- A supported smart-home platform or hub, if required by your devices
- A ladder or screwdriver only if installation instructions call for one
Knowledge:
- Basic ability to install an app and connect a device to Wi-Fi
- Access to the home router settings or help from the network administrator
- Understanding of which household actions devices may control, such as lights, heating, or locks
Check device compatibility before buying or installing. Products may require a particular platform, hub, Wi-Fi band, or protocol such as Matter, Thread, or Zigbee. Keep the product manuals and account recovery details available. Do not install electrical devices or modify wiring unless the manufacturer permits it and you are qualified to do so.
Hubitat Elevation C-8 Pro Smart Home Hub
The Hubitat Elevation C-8 Pro is our top choice because it addresses home automation at the system level rather than adding one more remotely controlled device. Its AI-assisted routine builder and advanced rule engine give us tools to connect compatible lights, locks, thermostats, and other devices into routines. More importantly, it processes automations locally, so supported routines can continue during an internet outage instead of relying on a cloud connection for every action.Its range of Matter, Z-Wave, Zigbee, and Bluetooth makes it more adaptable than either lock in this roundup. Schlage is a focused deadbolt, and Aqara is a feature-rich lock with Matter over Thread; Hubitat is meant to coordinate a wider home setup. Compatibility with Alexa, Google Home, and Apple HomeKit further broadens its role, though buyers should confirm that specific devices and desired integrations are supported.The tradeoff is that versatility brings a learning curve. Setup may require consulting documentation or the online community, and advanced rules can take time to refine. Unlike Schlage’s more direct app-and-keypad proposition, this hub asks us to think through devices, triggers, and routine behavior. It is the best fit for buyers who want control and resilience, not for someone seeking a quick standalone lock upgrade.
Pros:
- Local processing can keep compatible automations running without internet access.
- Supports Matter, Z-Wave, Zigbee, and Bluetooth.
- Works with Alexa, Google Home, and Apple HomeKit.
- AI-assisted routine builder and advanced rule engine, with no required subscription.
Cons:
- Setup and advanced automation may require research and configuration time.
- Buyers need to verify compatibility for individual devices and integrations.
Best for: Buyers building a multi-brand smart home who want local routines, flexible protocol support, and no required subscription.
Not ideal for: People who want a simple plug-in-and-forget device, or who only need remote access to one door.
Bottom line: Choose Hubitat when we want an automation brain that can connect devices and keep supported routines local, and accept a more involved setup in return.
“Choose Hubitat when we want an automation brain that can connect devices and keep supported routines local, and accept a more involved setup in return.”
Aqara U400 UWB Smart Lock with Apple Home Key and Fingerprint Deadbolt, Black
The Aqara U400 is the more ambitious lock in this comparison. It combines UWB hands-free unlocking with fingerprint, passcode, app access, voice assistant control, physical key, and Apple Home Key. That variety lets household members choose different ways in, and gives us alternatives if one method is inconvenient. Compared with the Schlage Arrive’s emphasis on keypad codes and app control, Aqara prioritizes multiple modern entry paths.It uses Matter over Thread, and its rechargeable battery can be removed and charged over USB-C. Aqara also lists an IP65-rated exterior, BHMA certification, and a rekeyable cylinder—practical considerations for a door-facing device. As an automation pick, though, it is narrower than Hubitat: it can make entry more convenient, but it is not a general-purpose hub for coordinating a home’s lights, thermostats, and other equipment.The key caveat is that UWB is not a universal phone feature. Hands-free unlocking and Apple Home Key depend on compatible Apple devices and a Thread-enabled Apple Home hub, with specified software versions; the NFC card is sold separately. Battery life is rated for up to six months per charge and will vary with use. We should choose Aqara over Schlage when its broader access methods suit our household, but skip it if we do not have the required Apple setup or want a simpler lock.
Pros:
- Offers UWB hands-free unlocking, fingerprint, passcode, app, voice, and physical-key access.
- Rechargeable removable battery charges via USB-C.
- BHMA-certified, with an IP65-rated exterior and rekeyable cylinder.
- Matter over Thread connectivity supports smart-home integration.
Cons:
- UWB and Apple Home Key require compatible Apple devices and a Thread-enabled Apple Home hub.
- NFC card is sold separately.
- Up-to-six-month battery life depends on use and charging upkeep.
Best for: Households seeking several entry methods, especially Apple users with the compatible hub and devices needed for UWB.
Not ideal for: Buyers without compatible Apple hardware who mainly want a simple keypad lock or a whole-home automation controller.
Bottom line: Pick Aqara for flexible, hands-free smart-lock access if our Apple and Thread setup meets its requirements; otherwise, Schlage is the more straightforward lock choice.
“Pick Aqara for flexible, hands-free smart-lock access if our Apple and Thread setup meets its requirements; otherwise, Schlage is the more straightforward lock choice.”
Schlage Arrive Smart WiFi Deadbolt with Camelot Trim, Satin Nickel
The Schlage Arrive makes the most sense when our goal is practical door access, not a full automation system. Its Schlage Home app supports remote locking and monitoring over WiFi, while Bluetooth provides nearby control. The backlit, all-weather silicone keypad and capacity for up to 250 access codes make it useful for households that need to share entry without handing out physical keys. Installation requires a screwdriver and fits standard doors, so it is a more direct upgrade than setting up a hub and building routines.Compared with the Aqara U400, Schlage is less elaborate: it does not offer the listed fingerprint or UWB methods, but it avoids making entry depend on compatible Apple hardware. Alexa and Google Home compatibility can bring it into voice-controlled routines, yet it remains a lock-first product, not a central automation controller like Hubitat. Buyers choosing among all three should distinguish app control from broader AI-led orchestration: Schlage handles a specific task well, while Hubitat can coordinate compatible devices around rules.Remote operation requires WiFi, and the battery-powered design means battery upkeep remains part of ownership. That contrasts with Hubitat’s local processing, which can preserve supported routines through an internet outage. Schlage is the sensible pick for a familiar keypad and remote monitoring, but buyers who want hands-free access or deeper multi-device automation should look to Aqara or Hubitat, respectively.
Pros:
- Remote locking and monitoring through the Schlage Home app.
- Stores up to 250 access codes and provides lock history and notifications.
- Works with Alexa and Google Home.
- Screwdriver installation and no hardwiring required.
Cons:
- Remote control requires a WiFi connection.
- Battery-powered operation requires battery maintenance.
- Offers less whole-home automation flexibility than Hubitat and fewer entry methods than Aqara.
Best for: Households that want a familiar keypad deadbolt with app-based remote monitoring, shared codes, and Alexa or Google Home support.
Not ideal for: Buyers who need offline-capable remote routines, fingerprint or UWB entry, or a hub for whole-home automation.
Bottom line: Choose Schlage for accessible keypad-and-app control; move up to Aqara for more entry methods or Hubitat for system-wide automation.
“Choose Schlage for accessible keypad-and-app control; move up to Aqara for more entry methods or Hubitat for system-wide automation.”
As an Amazon Associate we earn from qualifying purchases.
Before You Start
Decide what you want the system to do before pairing devices. Start with one practical outcome, such as turning off a lamp at bedtime or adjusting the thermostat when everyone leaves. Avoid automating safety-critical actions until you understand how the device behaves and what happens if internet or power service fails.
Use strong, unique passwords for device and platform accounts, and turn on multifactor authentication when offered. Review the device’s microphone, camera, location, and data settings. If the home includes children, guests, tenants, or shared accounts, tell affected people what the devices can sense and control. Keep manual controls available for lights, heating, and other equipment.
Step-by-Step Instructions
Step 1: Choose a small first set of devices
Write down the first task you want to automate, then select only the devices needed for it. For a bedtime routine, that might be a smart speaker and compatible lights. For temperature control, choose a thermostat designed for your heating and cooling system. Check each product’s supported platform, required hub, network band, and regional availability before purchase.
Read the installation and safety instructions. Confirm that plugs, bulbs, switches, and sensors match the electrical ratings and fittings in your home. Do not assume that devices from one brand will work together simply because each is described as smart.
Tip: Start with a low-risk task. Avoid using a new system as the only way to control a door lock, alarm, heater, or other security- or safety-related equipment.
Check: You can name the task, the devices required, and the platform or hub that supports them.
Step 2: Prepare your network and accounts
Check that your phone has internet access and that the home Wi-Fi signal reaches each planned device location. Find out whether a device needs a 2.4 GHz network, a 5 GHz network, or a hub; use its setup guide rather than guessing. Install the official apps from the app store and create or sign in to the required accounts.
Update your router firmware if the router maker recommends an update, and set a unique Wi-Fi password if your current one is weak or shared too widely. If you use a separate guest network, check whether it permits devices to communicate with your phone and smart-home hub. Some guest networks block that communication.
Tip: Do not share your main account password with household members. Use the platform’s household or device-sharing controls where available.
Check: You can sign in to the required apps, know the network details, and have confirmed that the device locations receive a usable signal.
Step 3: Install and power each device
Place each device according to its manual. Keep speakers away from loud appliances, sensors clear of obstructions, and cameras aimed only at areas you are permitted to monitor. Install bulbs, plugs, or batteries with power off when the instructions call for it. For thermostats or wired switches, follow the model’s compatibility checks and stop if the work requires electrical skills you do not have.
Connect power and wait for the device’s setup indicator, such as a pulsing light or startup tone. Keep the phone nearby. Install and pair devices one at a time so you can tell which one has a problem.
Tip: Do not place a device where heat, moisture, or direct sunlight exceeds its rated conditions. Never cover a sensor or ventilation opening to improve appearance.
Check: The device powers on, shows the expected setup state, and is positioned as its instructions require.
Step 4: Pair devices with the app and platform
Open the manufacturer’s app, select its add-device option, and follow the prompts to scan a code or put the device into pairing mode. Select the correct Wi-Fi network and enter its password carefully. Give the device a clear name, such as “Living room lamp,” rather than a vague name that could refer to several devices.
If you use a separate smart-home platform, link the manufacturer account or add the device using the platform’s supported setup method. For Matter devices, use the provided pairing code and follow the platform’s instructions. Do not reset a device or unlink its account unless the app’s guidance calls for it, because that can erase settings.
Tip: If setup asks for a location or room, assign it now. Accurate room names make voice commands and routines less confusing.
Check: The device appears in the app or platform, reports as online, and responds to a basic command from the phone.
Step 5: Set privacy, access, and AI controls
Open the device and platform settings and review microphone, camera, location, voice-history, personalization, and data-sharing options. Turn off features you do not want to use. If voice recognition or personalized recommendations require storing recordings or activity, read the relevant controls before enabling them.
Set a strong account password and enable multifactor authentication if available. Remove unknown users and grant household members only the access they need. For cameras and door devices, configure activity zones, notifications, and recording settings to match your household’s privacy expectations and local rules.
Tip: A physical microphone or camera switch can provide a clear local way to pause sensing. Check what the indicator light means on your particular model.
Check: You know which sensors are active, who can control the devices, and how to pause or change the AI and data settings.
Step 6: Create one simple automation
In the platform app, open its routine, automation, or scene feature. Choose a clear trigger, such as a set time, a motion sensor event, or a voice command. Add one or two actions, such as turning off a named light. Set conditions only when needed, for example, limiting a motion-triggered light to nighttime.
Check the routine’s time zone, days, room, and device names. If the platform offers a learning or suggestion feature, review the proposed schedule before accepting it. Do not let an inferred pattern control an unfamiliar device without checking what will happen and when.
Tip: Keep the first routine simple. A single trigger and a small number of actions are easier to diagnose than a long chain of conditions.
Check: The routine is saved, has a readable name, and lists the intended trigger, conditions, and actions.
Step 7: Test the routine and its manual fallback
Run the routine using the app’s test option or trigger it under the intended conditions. Confirm that every named device responds, that the timing is acceptable, and that unrelated devices stay unchanged. Test voice commands from the usual room if voice control is part of the setup.
Then test manual control using the device’s button, wall switch, or manufacturer app. Check what happens if the internet connection is unavailable, since some devices continue to work locally while others do not. If a routine controls heating, locks, or other consequential equipment, test a harmless scenario first and read the manufacturer’s guidance about failure behavior.
Tip: Do not rely on a single successful test if the routine depends on a sensor or schedule. Repeat it under the relevant lighting, room, or time conditions.
Check: The intended action occurs at the expected time or trigger, and you can still control the device manually.
Step 8: Document the setup and add devices gradually
Record device names, rooms, account recovery options, hub requirements, and the purpose of each routine in a secure place. Do not write passwords in an unprotected note. Show household members how to use the normal controls and how to pause a sensor or automation.
Use the system for several days before adding more routines or devices. If it behaves as expected, add the next device and repeat the pairing and test process. Review app and firmware updates through official sources, and check whether an update changes privacy settings or routine behavior.
Tip: Keep the original manual and any pairing code in a safe place. A reset or account change may require them later.
Check: The setup is documented, household users know the manual controls, and each active automation has been tested.
Common Mistakes to Avoid
- Buying devices before checking platform, hub, or Wi-Fi compatibility. — Check the exact model’s requirements and supported integrations before purchase. Confirm whether a hub is needed and whether your router supports the required network band.
- Creating complex routines before confirming basic device control. — Pair one device at a time, test it from the app, then build one short routine. Add conditions only after the basic trigger and action work.
- Leaving broad microphone, camera, or account access enabled by default. — Review privacy and sharing settings during setup, enable multifactor authentication, and limit access to people who need it.
- Using AI-generated or learned schedules without checking their behavior. — Review proposed changes before accepting them. Keep manual controls available and monitor the routine for several days before relying on it.
Troubleshooting
Problem: The device does not appear during pairing or cannot join Wi-Fi.
Solution: Move the phone and device closer to the router, verify the Wi-Fi password, and check the model’s required network band. Temporarily disable VPN or mobile data only if the manufacturer’s setup instructions recommend it. Restart the device and app, then follow the official reset procedure only if ordinary pairing fails.
Problem: The app shows the device as offline after setup.
Solution: Check that the device has power and that the router is online. Move it closer to the router or hub, then restart the device and router if other household members can safely tolerate a brief outage. Check for a router setting that isolates wireless devices from one another.
Problem: A voice command controls the wrong device or is not understood.
Solution: Rename devices with distinct, simple names and assign them to the correct rooms. Check that the speaker is linked to the correct account and platform. Test the device from the app first to separate a voice-recognition issue from a connection issue.
Problem: An automation runs at the wrong time or does not trigger.
Solution: Review the time zone, schedule, enabled days, sensor permissions, and conditions. Check whether the trigger device is online and whether the platform requires an internet connection. Run the routine manually, then test the trigger again while watching the activity log if the app provides one.
What Success Looks Like
The setup is working when each device appears online in its intended room, responds to app or manual controls, and follows its tested routine without affecting unrelated equipment. You should be able to identify which microphones, cameras, or other sensors are active, manage who has account access, and explain how to pause an automation or control a device manually. If a device fails during the test, treat the setup as incomplete until you fix the cause or remove that device from the routine.
Next Steps
Use the first routine for several days and check its activity or history for missed triggers and unwanted actions. Adjust only one setting at a time so you can identify what changed. Add another device or routine only after the current setup behaves reliably.
Review account access, privacy settings, and device firmware periodically, especially after changing your router or household members. If a device controls a lock, alarm, heating system, or electrical circuit and its behavior remains uncertain, disable the automation and contact the manufacturer or a qualified installer.
Frequently Asked Questions
Do AI-powered home devices need internet access all the time?
It depends on the device and feature. Some basic controls or automations run locally, while voice assistants, remote access, cloud history, and some AI processing need internet access. Check the product documentation and test which functions remain available when the internet is disconnected.
Can devices from different brands work together?
Sometimes. Compatibility depends on the platform, supported integration, hub, and communication standards. Check the exact device model and required features before buying; a shared standard does not necessarily mean every feature works across platforms.
Should I let a device learn my household schedule automatically?
Only if you are comfortable with the data it uses and can review or change its suggestions. Start by observing proposed schedules rather than letting them control equipment automatically. Keep a manual override available.
What should I do if I change my Wi-Fi router?
Check the manufacturer’s instructions before replacing the router. Some devices let you update network details in the app; others require pairing again. Keep the network name and password available, and test each device and routine after the change.
Halloween Picks
halloween
As an affiliate, we earn on qualifying purchases.